Introduction
With Kubernetes becoming the de facto “operating system” for the cloud, I realized how important it is to understand its core mechanics. That’s why I decided to build my own Kubernetes cluster using Raspberry Pi. I wanted to get hands-on experience with networking and the foundational layers of cloud infrastructure. I followed different tutorials and blog posts to install k3s on Ubuntu servers and I’m sharing here the notes I took along the way. This setup gave me the chance to dive into container orchestration, network configurations, and system-level details, which will ultimately help me better serve my clients in the future. You can find all the references at the bottom of this page.
Target Topology
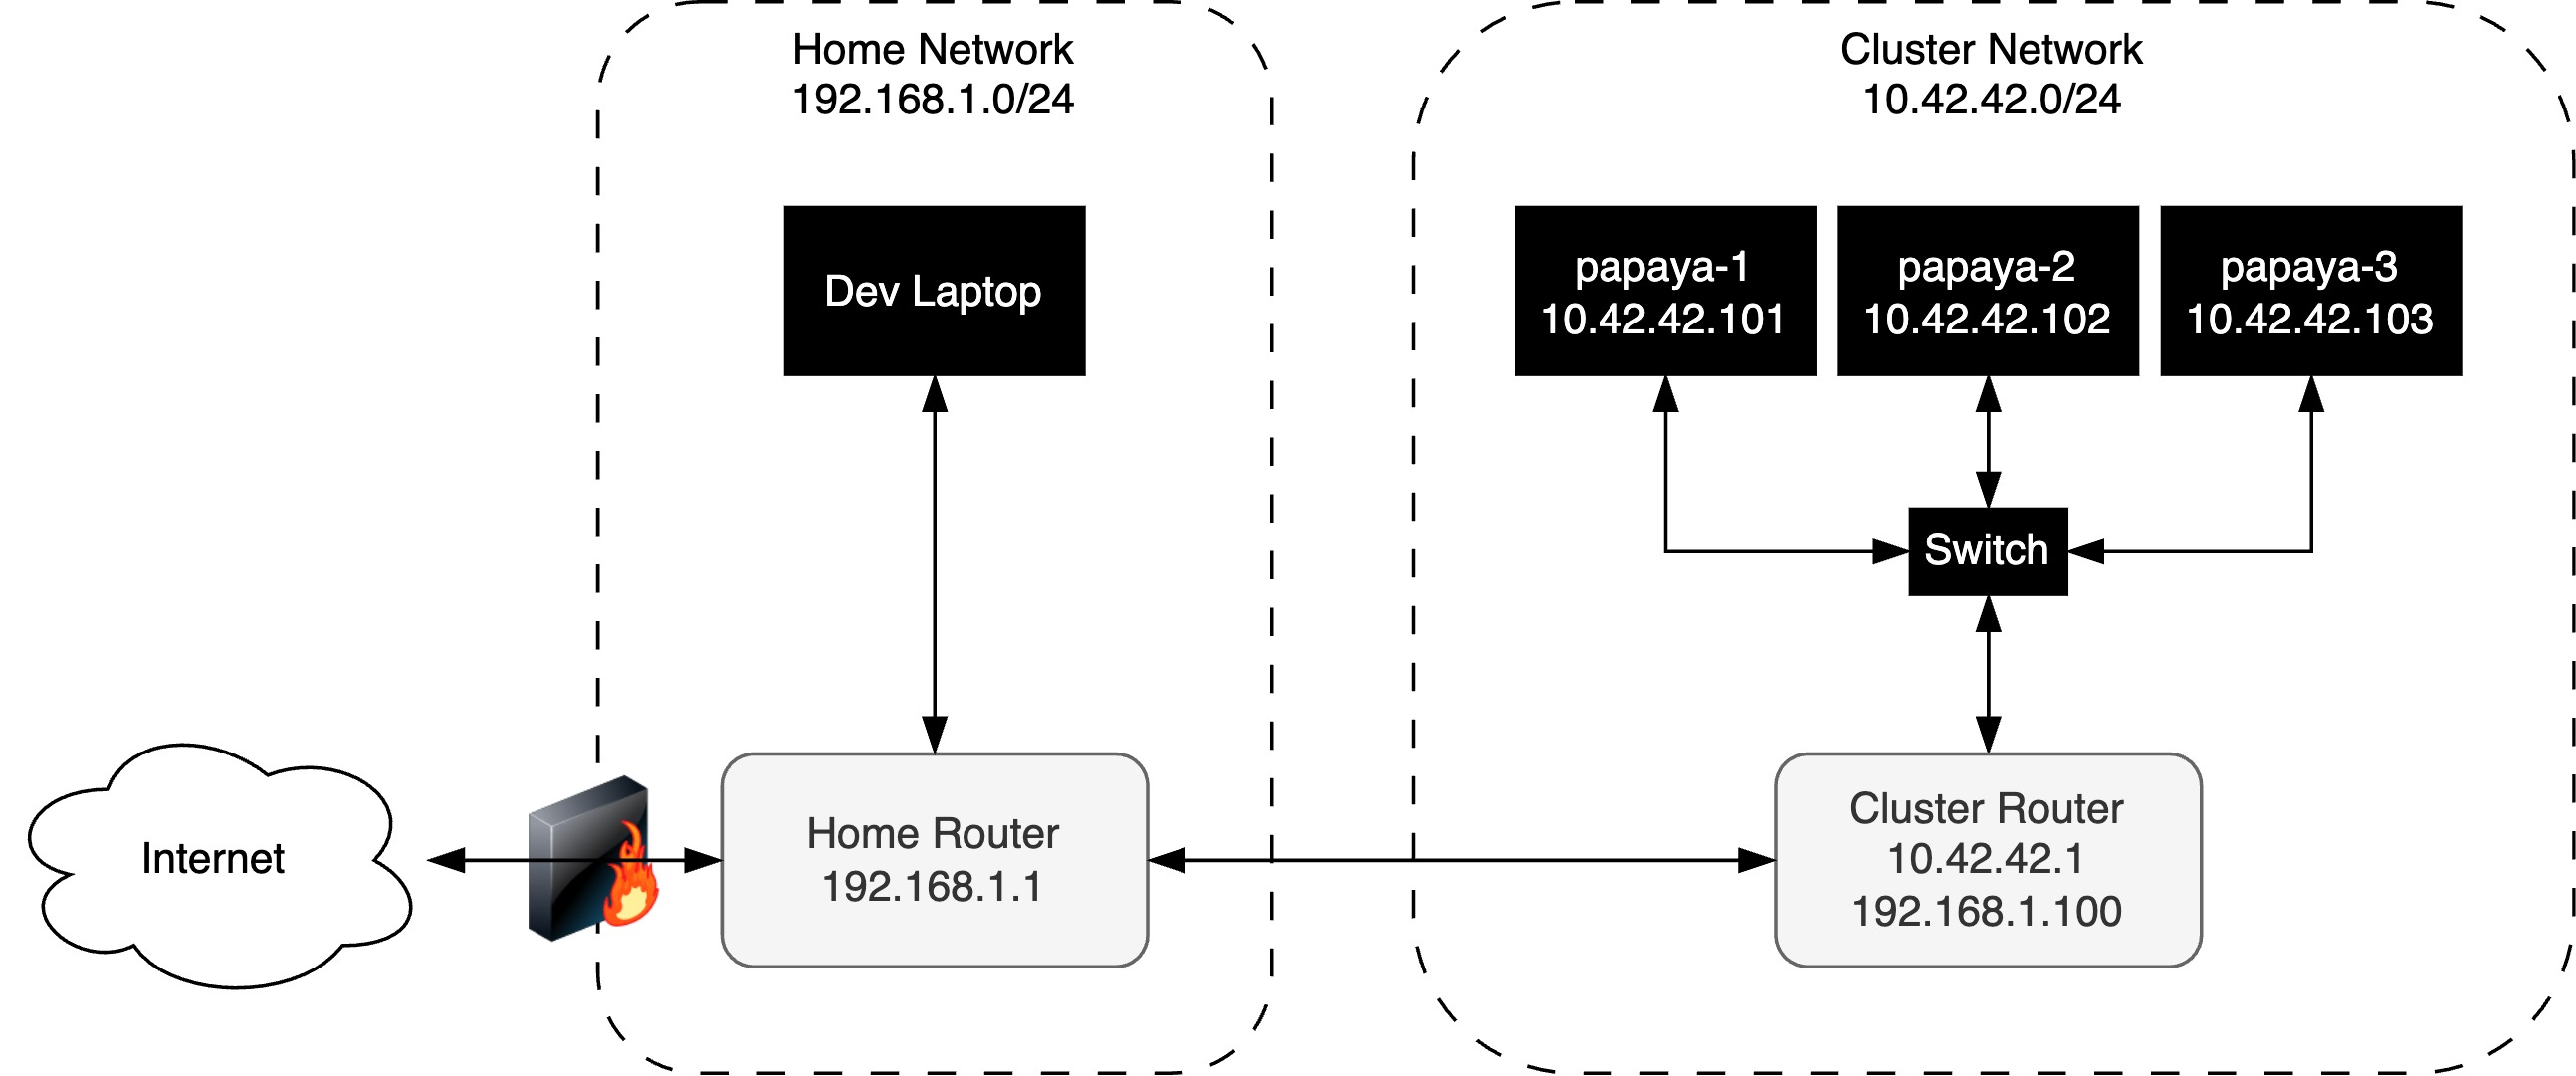
This project was initially inspired by the great blog post from Anthonyn Simon. Naturally, my target topology is similar to the one he described.
Dev Laptop Setup
I used my MacBook Air (Apple M3, 2024) as the development laptop. The MacBook served as the central hub for flashing SD cards, connecting via SSH to the Ubuntu servers running on the Raspberry Pis, and later running all kubectl commands to manage the cluster. Once the Kubernetes cluster setup, I only want to communicate with it via WIFI, and not have to connect any cable to the cluster’s switch.
- Create a SSH key pair
- Configure your SSH config to ease the connection later on
 # File: ~/.ssh/config

 Host papaya-1
   HostName 10.42.42.101
   User tanager
   PubKeyAuthentication yes
   IdentityFile ~/.ssh/<your-private-key-name>
   IdentitiesOnly yes
and similarly for papaya-2 and papaya-3
- Set up a static IP for your cluster router on your home router.
- Modify the routing table
sudo route add "10.42.42.0/24" "192.168.1.100". - Check the routing table
netstat -nr -f inetThe output should be similar to the following
 Routing tables

 Internet:
 Destination        Gateway            Flags               Netif Expire
 default            192.168.1.1        UGScg                 en0
 10.42.42/24        192.168.1.100      UGSc                  en0
 ...
Cluster Router Setup
I used the tp-link TL-WR902AC and achieving the correct network setup proved to be more challenging than I expected.
I simply couldn’t log into any of the nodes from my laptop without being connected to the switch.
This was resolved by modifying the cluster router’s firewall rule and my laptop’s routing table.
The tp-link factory firmware wouldn’t allow me to modify the router’s firewall when operating in client mode though.
I turned to the OpenWRT project and I followed this guide to install OpenWRT on my router.
I used Transfer to flash the router.
You can install Transfer as follow brew install --cask transfer.
Follow the steps below once OpenWRT is install
- Switch off your laptop’s WIFI
- Connect with an ehternet cable to the router
- Browse to 192.168.1.1
- In the LuCI web interface, navigate to Network > Interfaces
- Edit the “lan” interface
- Under the “General Settings” tab, make sure the protocol is set to “Static address”
- Under the “General Settings” tab, set the IPv4 address to “10.42.42.1”
- In the luci GUI, navigate to Network > DHCP and DNS > Static Leases
- Click on “Add” and reserve an IP address for each Raspberry Pi
papaya-1 10.42.42.101 papaya-2 10.42.42.102 papaya-3 10.42.42.103 - In the LuCI GUI, navigate to Network > Firewall
- If, like me, it is your first time messing around with firewall rules in LuCI, this video might be useful
- Edit the firewall rule for the wan zone
 I am not a security expert, but I believe it is fine to modify this firewall rule since it will sit behind the home router which firewall protects our cluster network from the internet.
Ubuntu Server Setup
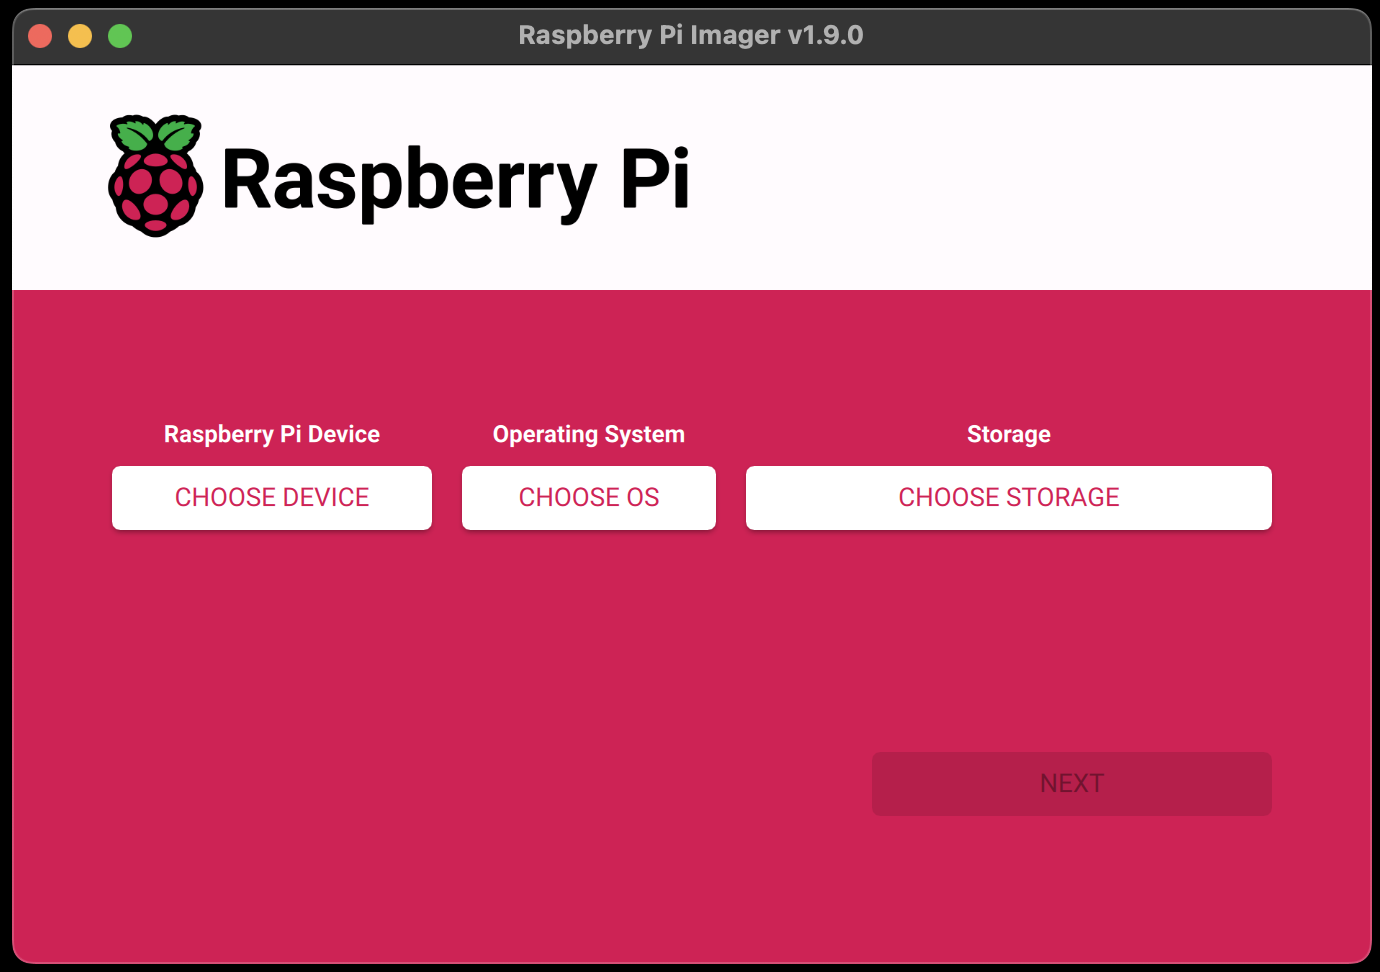
- Install Raspberry Pi Imager
brew install --cask raspberry-pi-imageron the Dev Laptop - Connect a microSD card
-
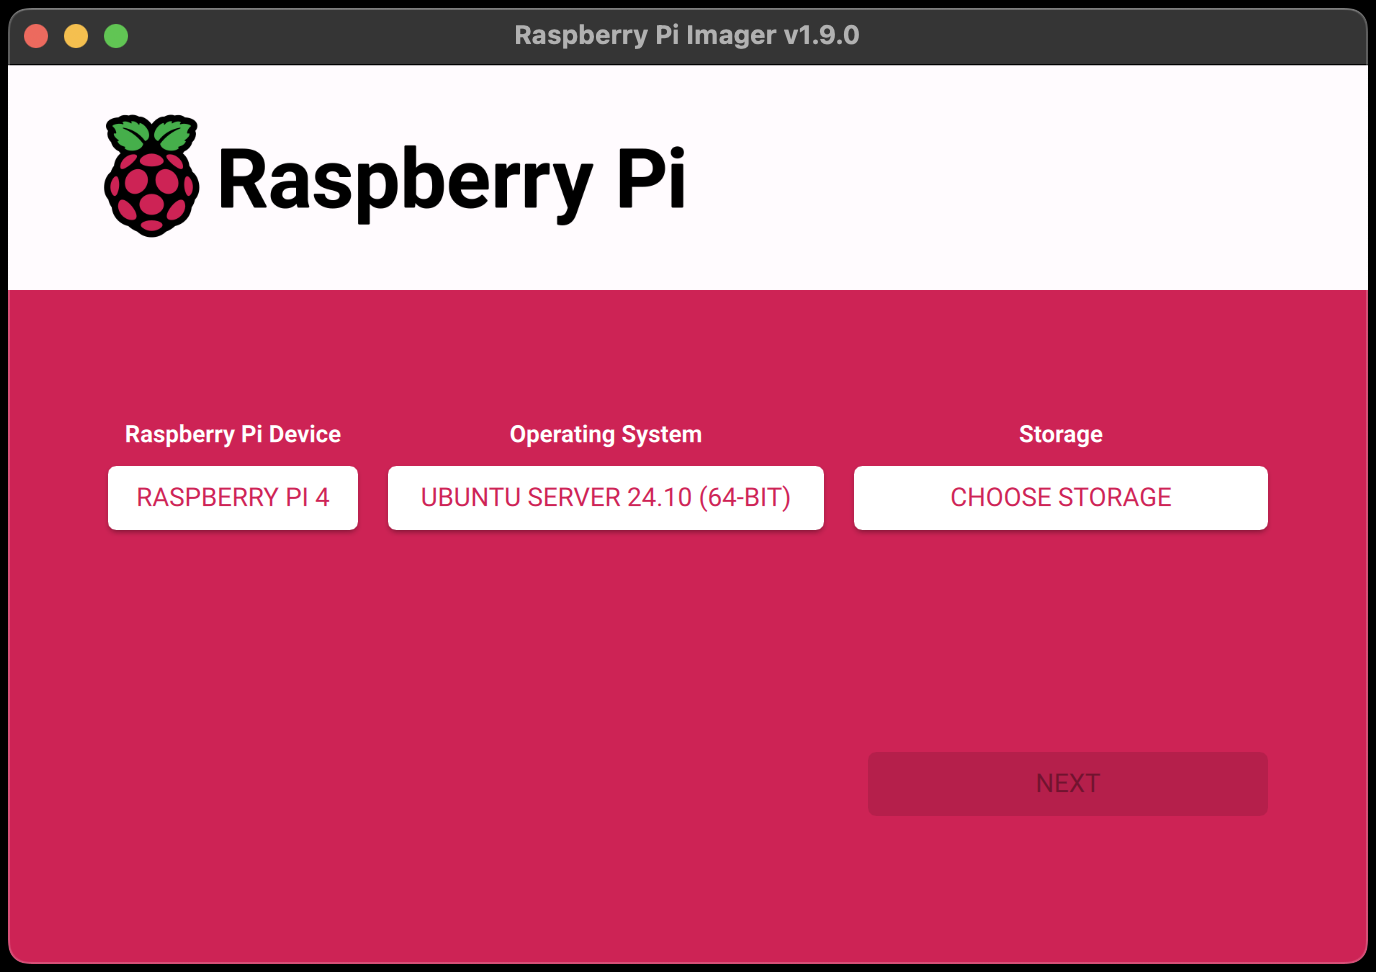
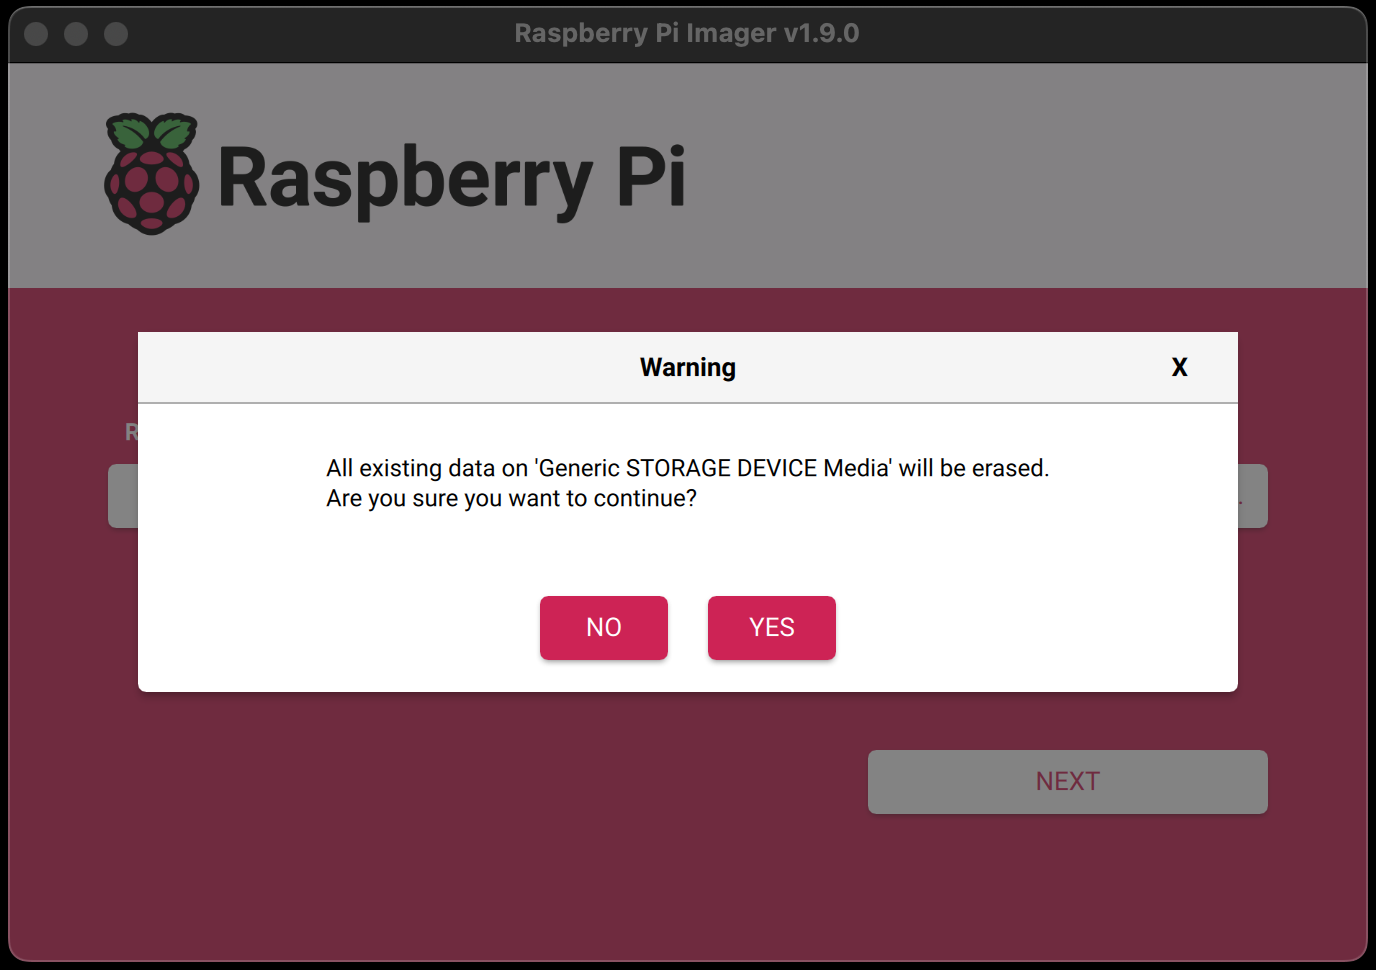
Flash Ubuntu server 24.04.1 LTS (64-bit)
- Disconnect microSD
- Reconnect microSD
- Add necessary config into the cloud-init user-data
# File: /Volumes/system-boot/user-data #cloud-config hostname: papaya-1 ssh_pwauth: false groups: - ubuntu: [root,sys] users: - default - name: tanager gecos: Tanager sudo: ALL=(ALL) NOPASSWD:ALL groups: sudo ssh_import_id: None lock_passwd: true shell: /bin/bash ssh_authorized_keys: - <your-pub-key> - Repeat the previous step for each Raspberry Pi
- Insert the microSD card in each Raspberry Pi
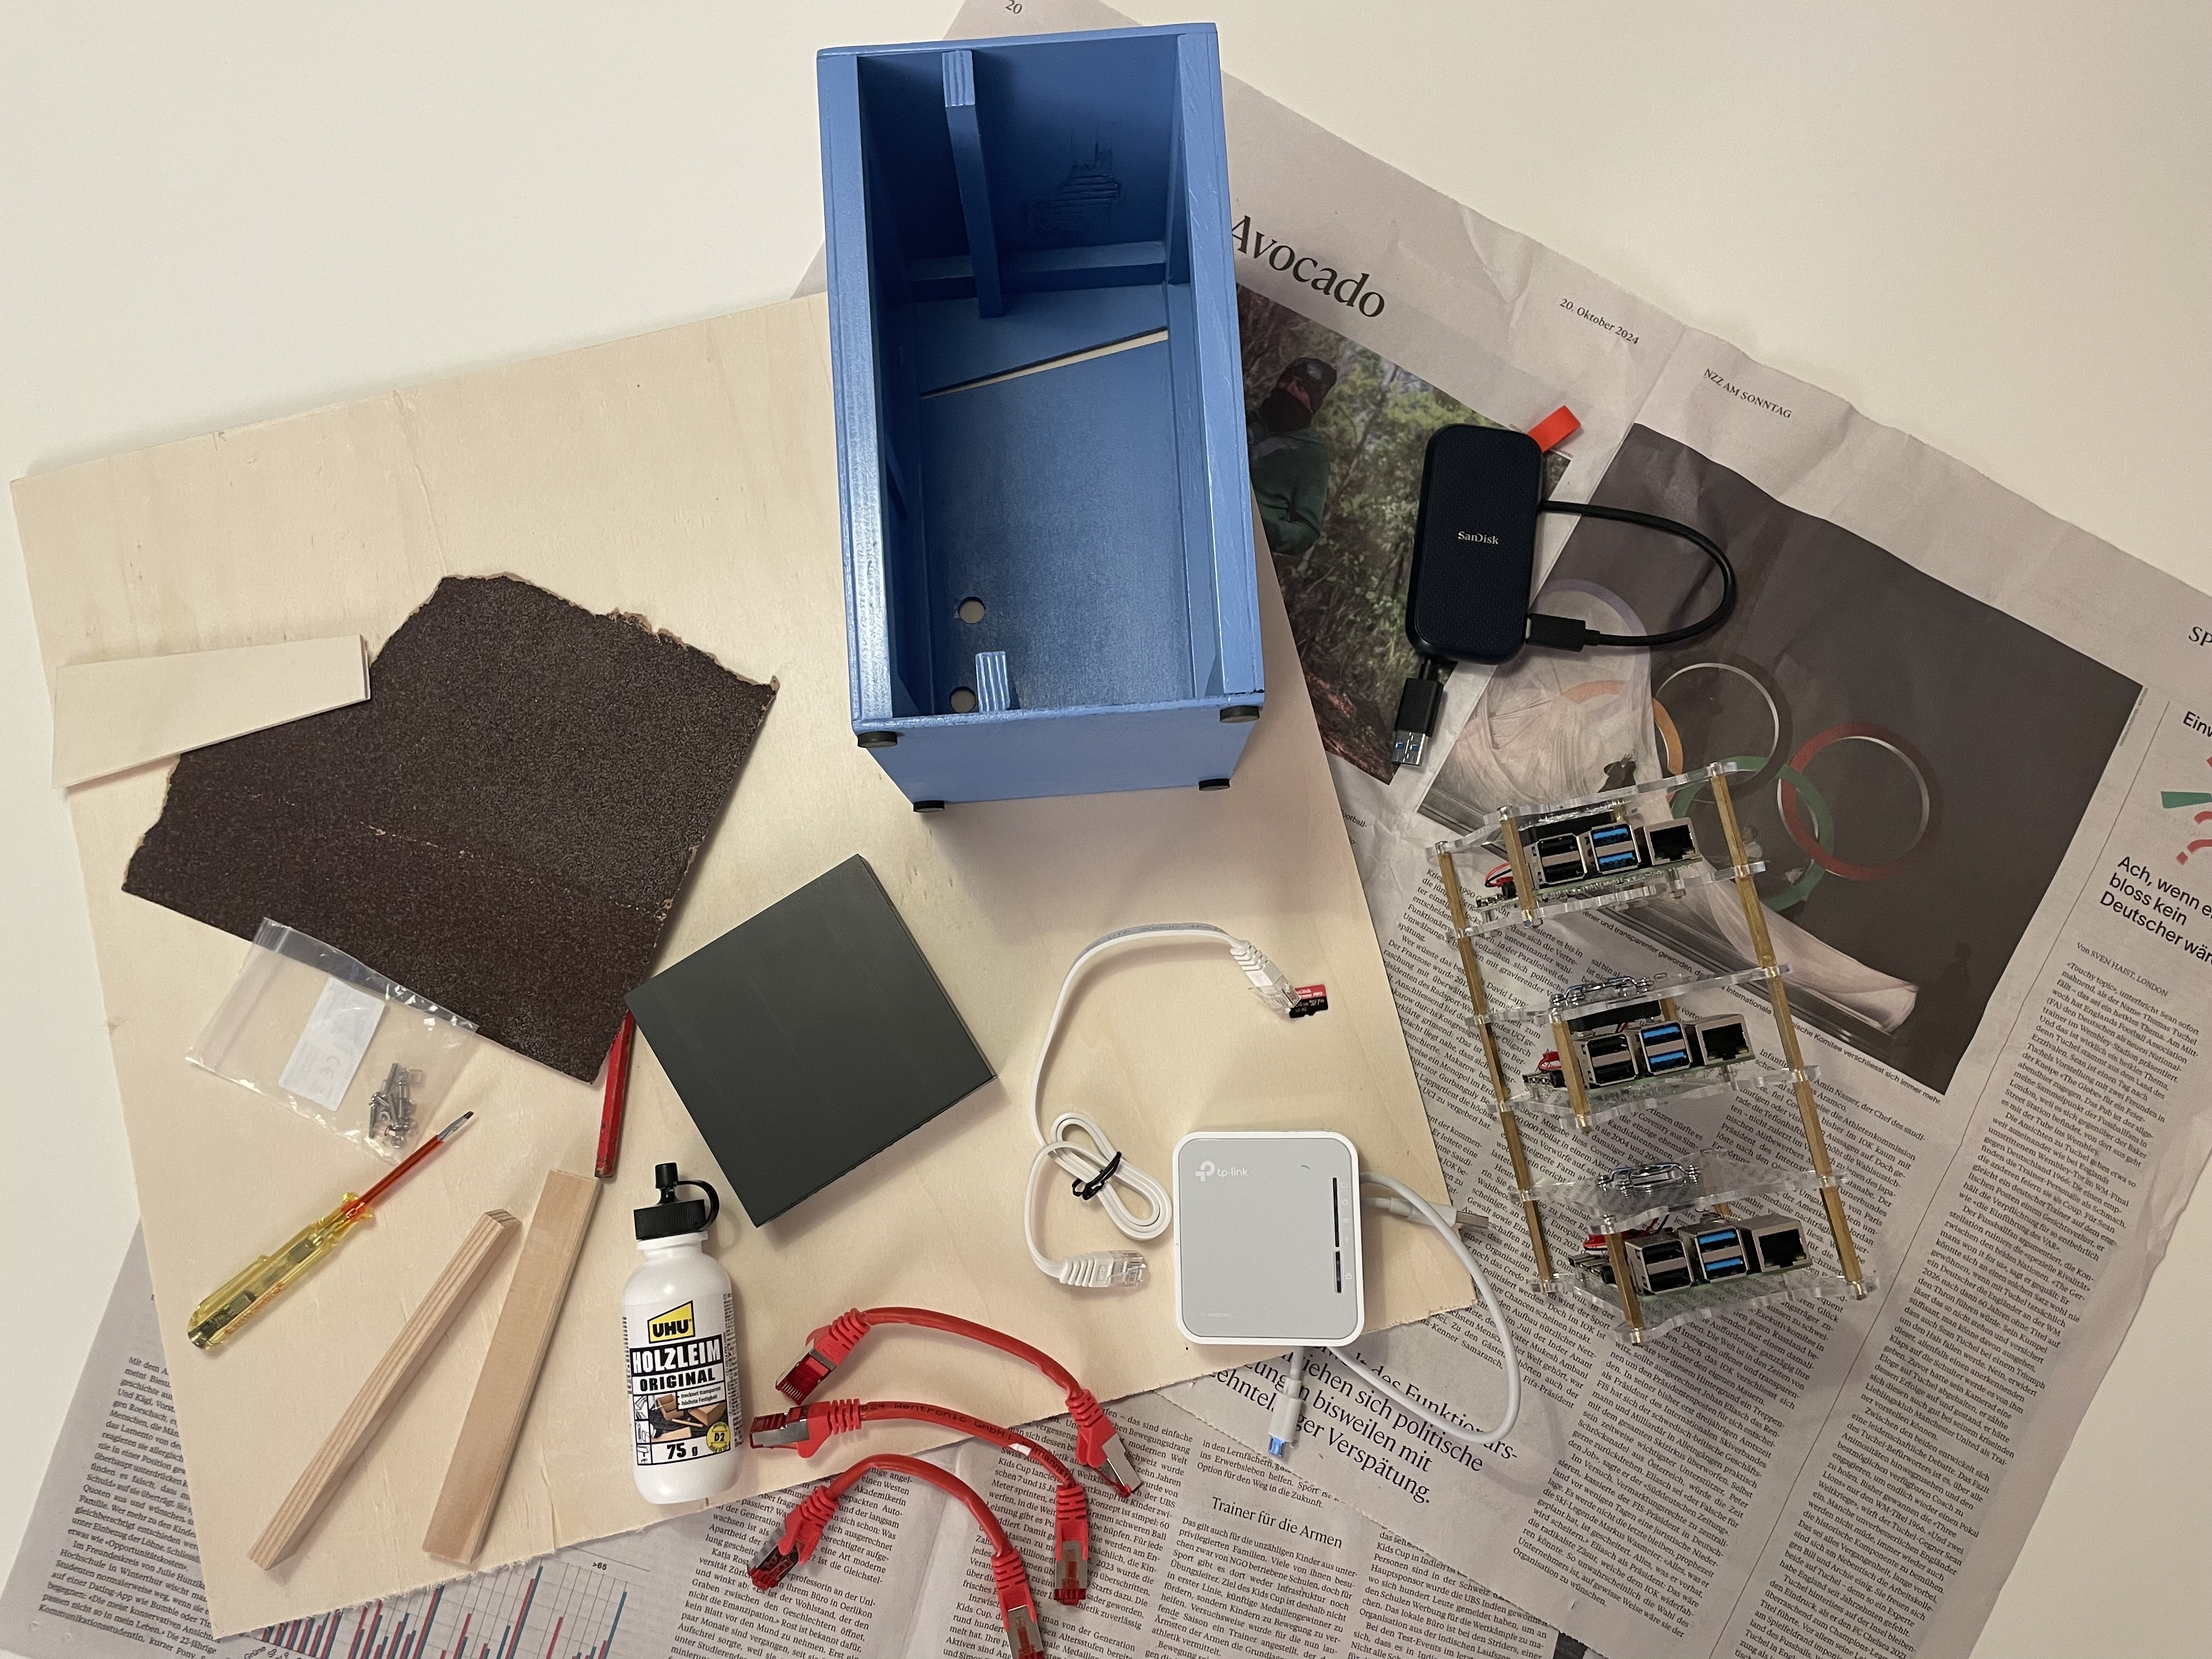
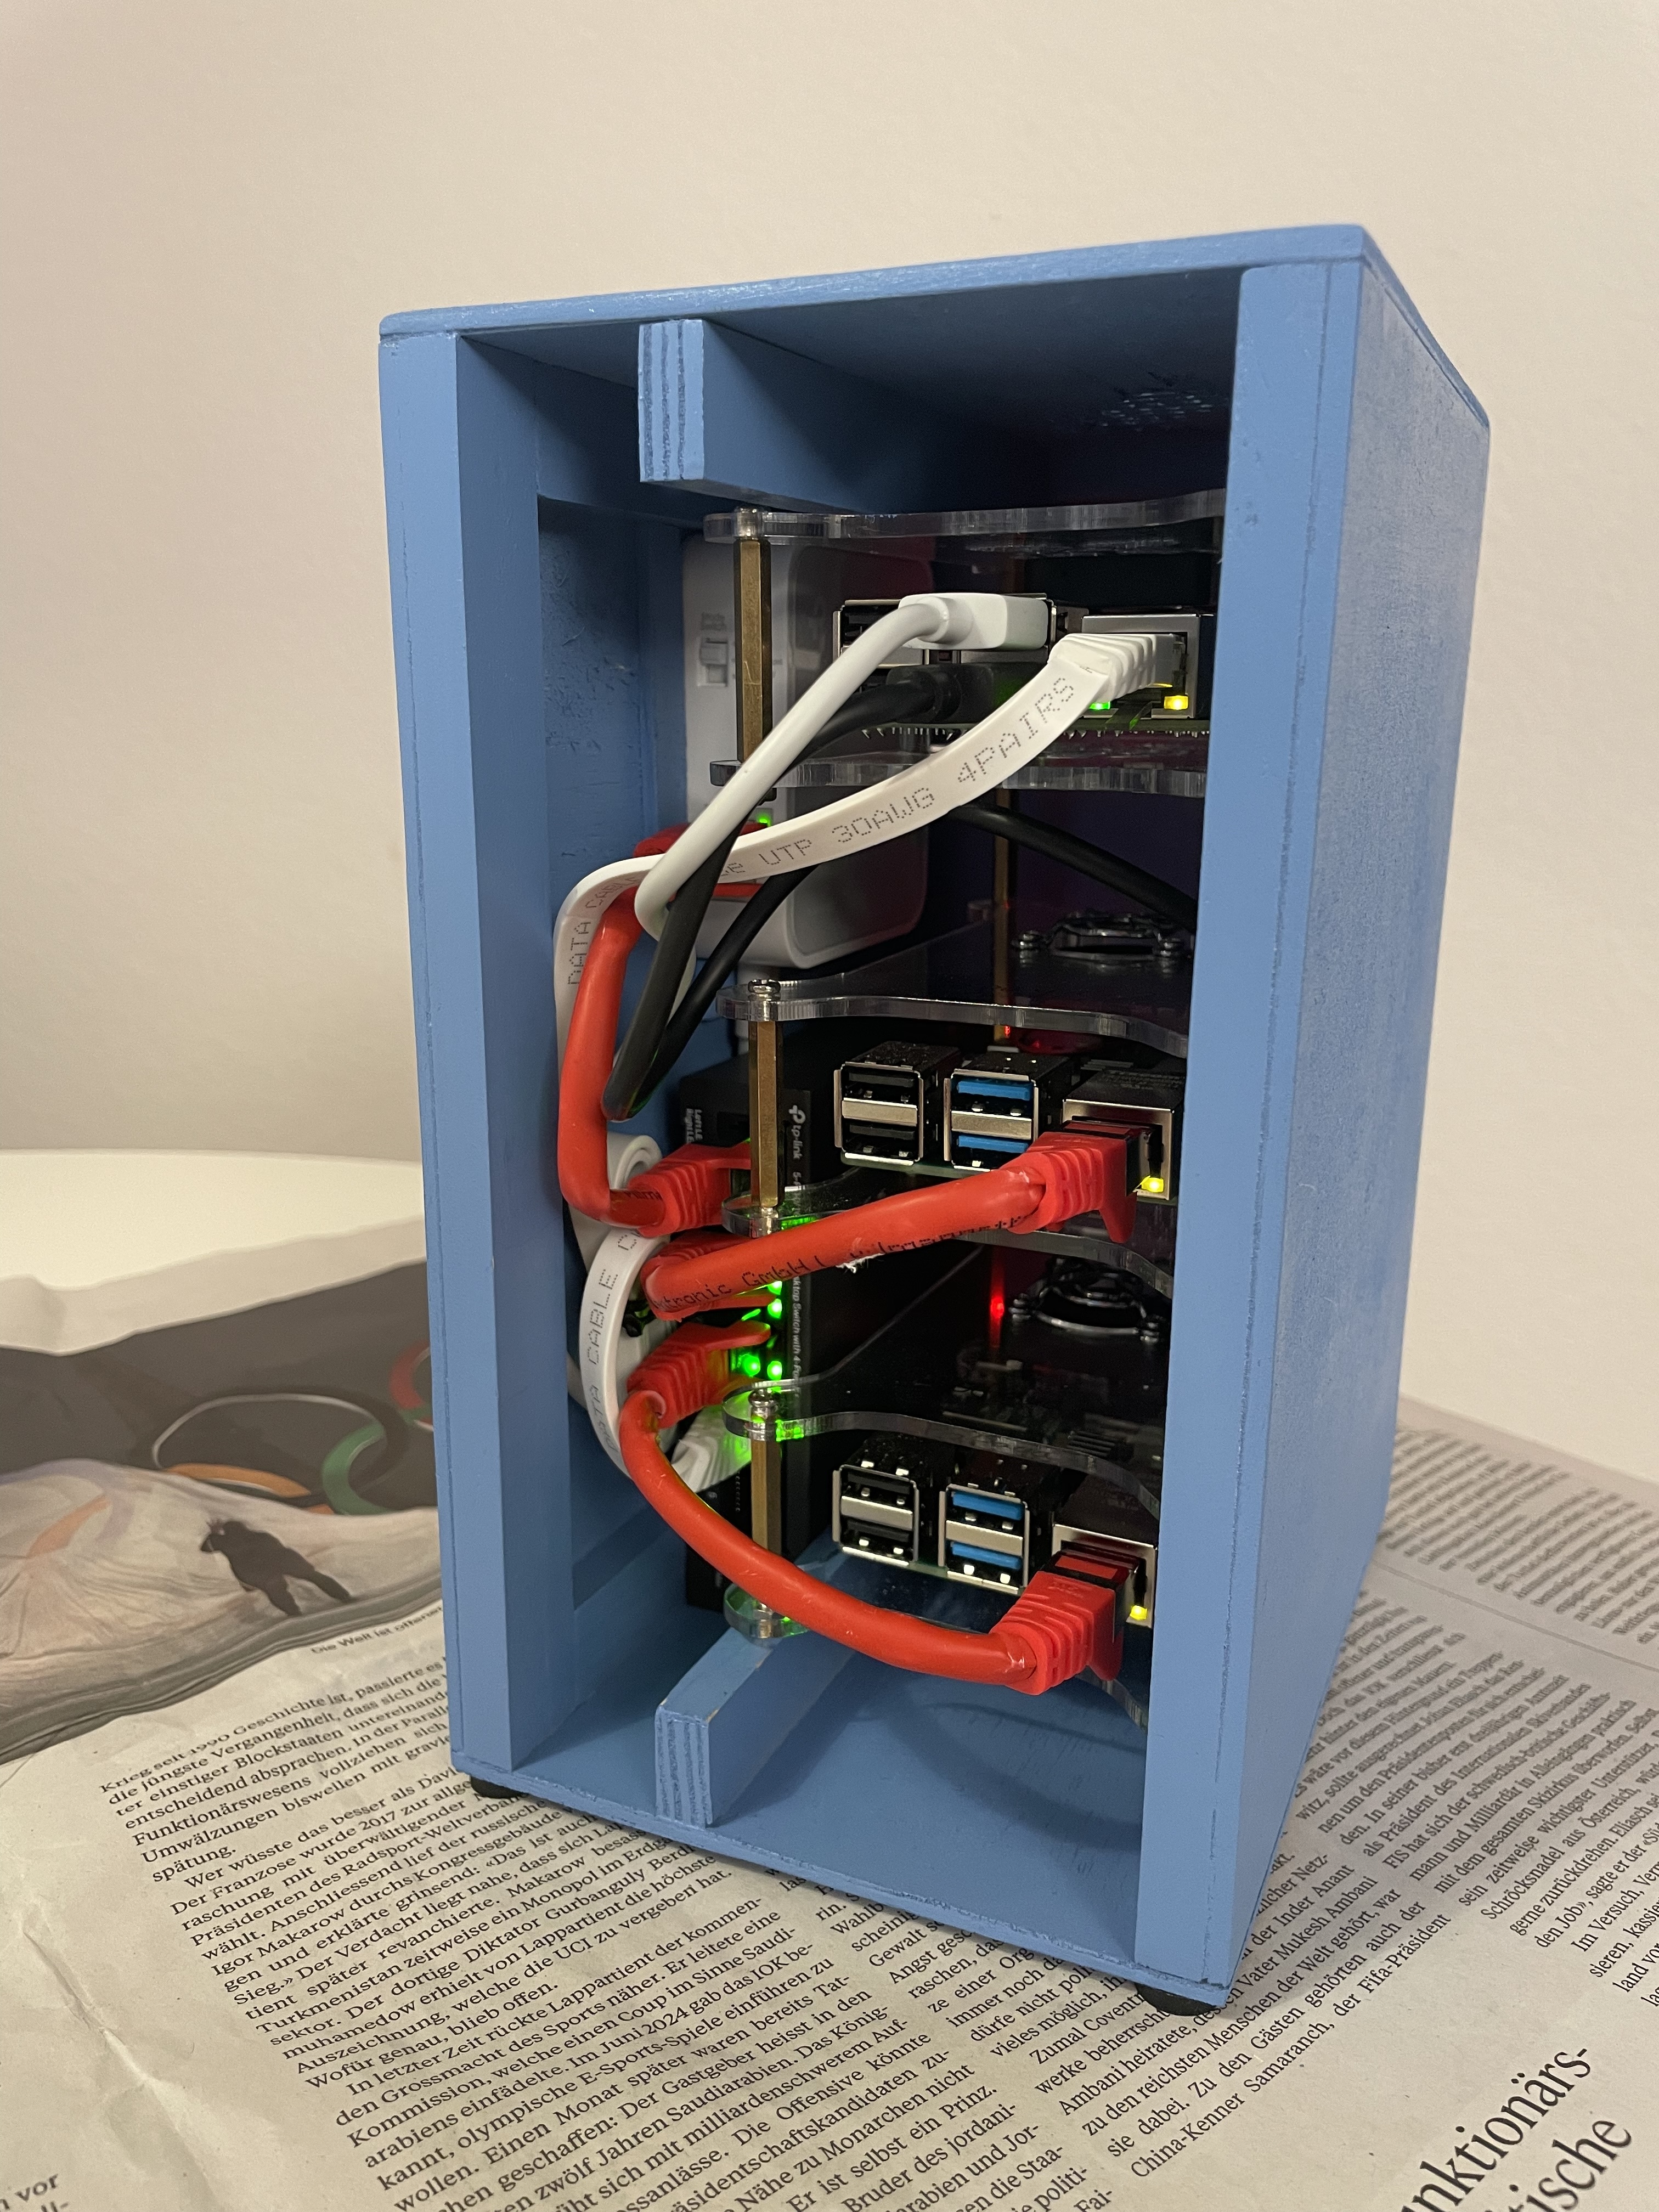
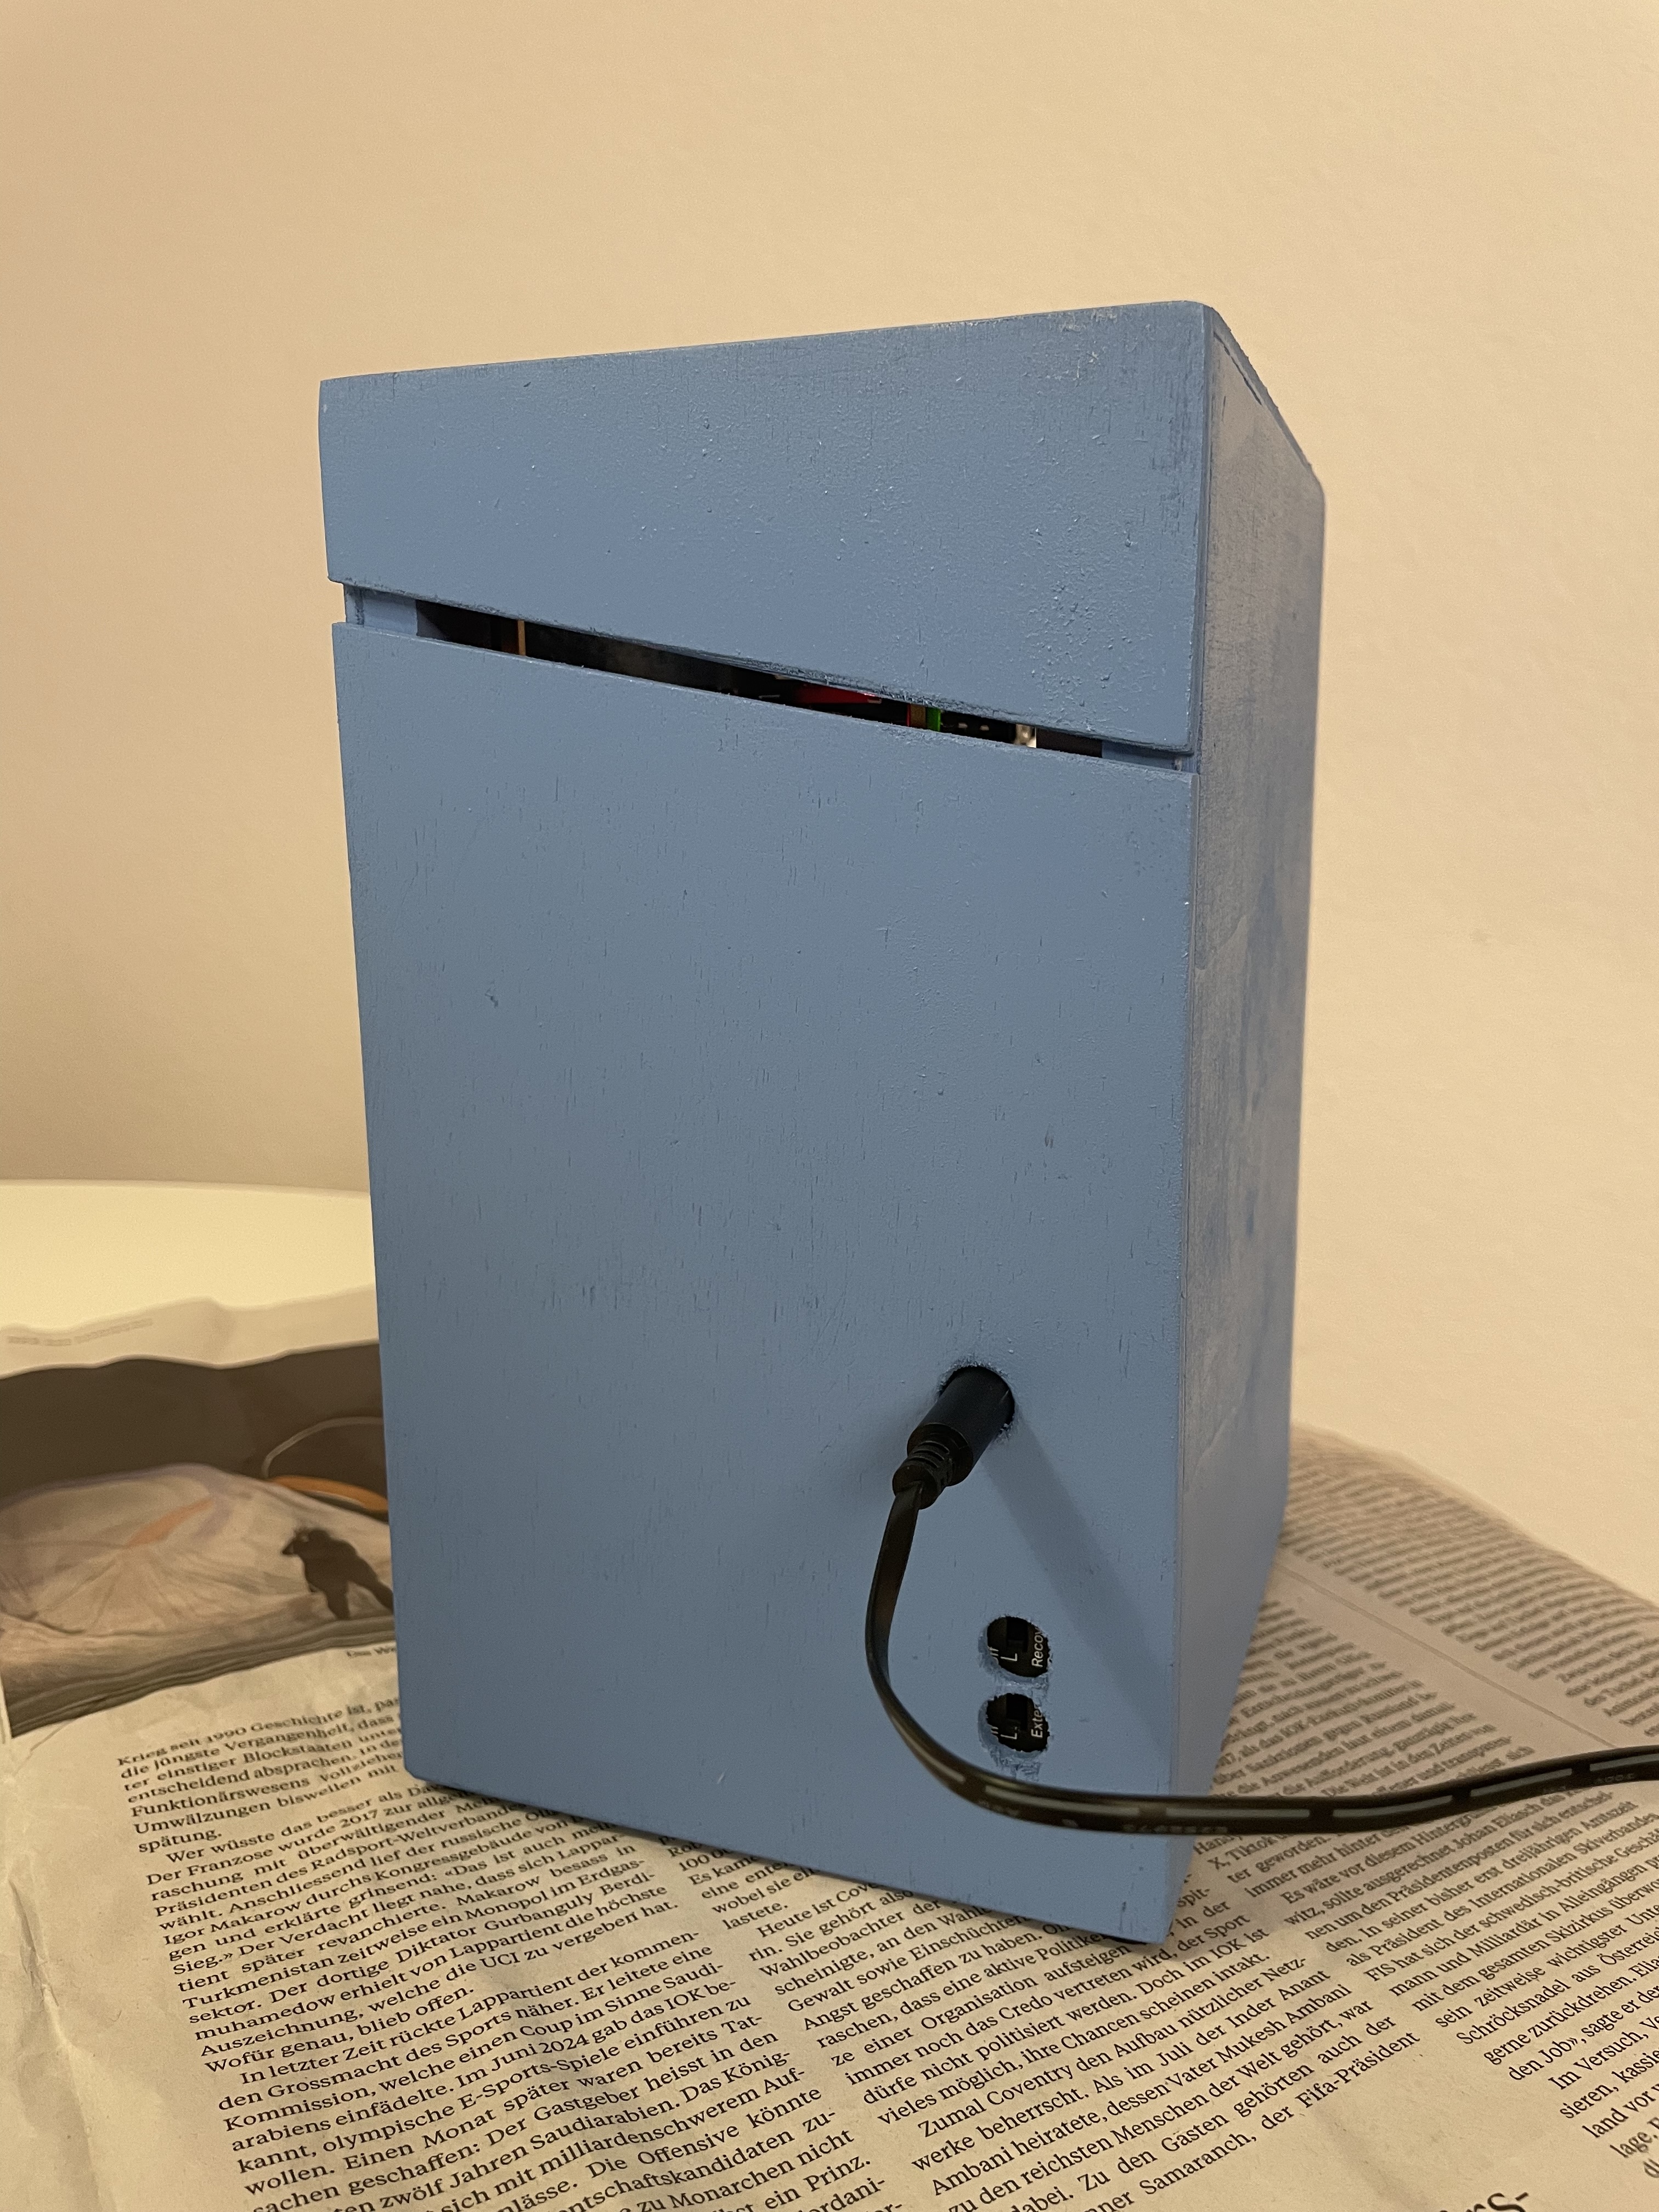
Assemble everything
 |
|---|
| I decided to build the case myself, using a bit of wood, glue and paint. |
 |
 |
|---|---|
| I left the front open, hoping this would allow enough airflow | Only the switch’s power cable needs to leave our little cluster |
K3s installation
Just like Anthonyn Simon, I installed k3s using the official installation script.
- Log into each machines
ssh papaya-1On the connection, we have to confirm that we want to connect. The host will be saved in
~/.ssh/known_hosts. System information will then be printed out:Welcome to Ubuntu 24.04.1 LTS (GNU/Linux 6.8.0-1017-raspi aarch64) ... - Update and upgrade packages
sudo apt update && sudo apt upgrade -y - Disable swap
 # Host: papaya-1, papaya-2, papaya-3

 sudo swapoff -a
 sudo vim /etc/dphys-swapfile
Insert
CONF_SWAPSIZE=0 - Make sure ufw is disabled, following k3s requirements
sudo ufw disable && sudo ufw status - Test connection between clusted nodes using netcat
nc -z 10.42.42.102 22We use the
-zoption because we’re only interested in scanning the port. We don’t want to send any data. The expected output is the followingConnection to 10.42.42.102 22 port [tcp/ssh] succeeded! - Check your version of
iptablesiptables --versionIf the version is 1.8.0-1.8.4, you might have to run the iptables in legacy mode
update-alternatives --set iptables /usr/sbin/iptables-legacy - Install k3s on server node. I chose
papaya-1as my server.# Host: papaya-1 curl -sfL https://get.k3s.io | INSTALL_K3S_EXEC="server --disable=traefik --flannel-backend=host-gw --tls-san=10.42.42.101 --bind-address=10.42.42.101 --advertise-address=10.42.42.101 --node-ip=10.42.42.101 --cluster-init" sh -s - - Make sure the server is ready
sudo kubectl get nodesThe expected output is
NAME STATUS ROLES AGE VERSION papaya-1 Ready control-plane,master 3s v1.31.4+k3s1 - We need to copy over the kube config to be able to use kubectl without elevated rights
 # Host: papaya-1

 echo "export KUBECONFIG=~/.kube/config" >> ~/.bashrc
 source ~/.bashrc
 mkdir ~/.kube
 sudo k3s kubectl config view --raw > "$KUBECONFIG"
 chmod 600 "$KUBECONFIG"
Now we are able to run
kubectl get nodes - Get the server token
 # Host: papaya-1

 sudo cat /var/lib/rancher/k3s/server/node-token
Which contains the following parts
<prefix><cluster CA hash>::<credentials> - Install k3s on each agent (i.e. papaya-2 and papaya-3) and allow them to join the k3s cluster
 # Host: papaya-2 and papaya-3

 NODE_TOKEN=<node-token-from-previous-step>
 SERVER_NODE_IP=10.42.42.101
 curl -sfL https://get.k3s.io | K3S_URL=https://$SERVER_NODE_IP:6443 K3S_TOKEN=$NODE_TOKEN sh -
The kubernetes API server process is listenning to port 6443 by default.
- Make sure the agents joined the cluster
 # Host: papaya-1

 kubectl get nodes
The expected output is
 NAME       STATUS   ROLES                  AGE    VERSION
 papaya-1   Ready    control-plane,master   5m     v1.31.4+k3s1
 papaya-2   Ready    <none>                 15s    v1.31.4+k3s1
 papaya-3   Ready    <none>                 16s    v1.31.4+k3s1
Note that in k3s, no roles are assigned to agents. They are still able to run worload. Hence
<none>is the expected role for papaya-2 and papaya-3.
Remote access to k3s cluster
So far, we could run kubectl commands after logging to our server node.
What happens when our flatmate asks to deploy an application on our new cluster?
We don’t want to take the risk of them messing up our nodes and our workloads.
Thus, we need to understand how to communicate with the kubernetes control plane from a machine which is not part of the cluster, like our dev laptop!
- Install
kubectl,kubectxandkubens# Host: dev laptop brew install kubernetes-cli && brew install kubectx - Copy the kube config from server node
# Host: papaya-1 kubectl config view --raw - On the dev laptop, create a
.kube/configfile and paste the information from the previous step or merge it with your existion kube config - Make sure the value of the server field is the IP of your K3s server (10.42.42.101)
- Check that you can communicate with the control plane from the dev laptop
 # Host: dev laptop

 kubectl get nodes
Expected output
 NAME       STATUS   ROLES                  AGE   VERSION
 papaya-1   Ready    control-plane,master   32m    v1.31.4+k3s1
 papaya-2   Ready    <none>                 32m    v1.31.4+k3s1
 papaya-3   Ready    <none>                 32m    v1.31.4+k3s1
Install kubernetes dashboard
- Install the kubernetes dashboard using the official helm chart
# Host: Dev laptop # Add kubernetes-dashboard repository helm repo add kubernetes-dashboard https://kubernetes.github.io/dashboard/ # Deploy a Helm Release named "kubernetes-dashboard" using the kubernetes-dashboard chart helm upgrade --install kubernetes-dashboard kubernetes-dashboard/kubernetes-dashboard --create-namespace --namespace kubernetes-dashboard - Create a user
 # service-account.yaml

 apiVersion: v1
 kind: ServiceAccount
 metadata:
   name: admin-user
   namespace: kubernetes-dashboard
# Host: Dev laptop kubens kubernetes-dashboard kubectl apply -f service-account.yaml - Create a (cluster) role binding
 # cluster-role-binding.yaml

 apiVersion: rbac.authorization.k8s.io/v1
 kind: ClusterRoleBinding
 metadata:
   name: admin-user
 roleRef:
   apiGroup: rbac.authorization.k8s.io
   kind: ClusterRole
   name: cluster-admin
 subjects:
   - kind: ServiceAccount
     name: admin-user
     namespace: kubernetes-dashboard
# Host: Dev laptop kubectl apply -f cluster-role-binding.yaml - Create a token and copy it
# Host: Dev laptop kubectl -n kubernetes-dashboard create token admin-user - Expose the dashboard
# Host: Dev laptop kubectl -n kubernetes-dashboard port-forward svc/kubernetes-dashboard-kong-proxy 8443:443 - Open your browser and visit
https://localhost:8443 - Log in using by pasting the token you copied previously
If you made it this far, that means your cluster is well running and healthy. Congrats!
Shuting down
- Agents
# Host: papaya-2, papaya-3 sudo systemctl stop k3s-agent sudo shutdown now - Server
 # Host: papaya-1
 sudo systemctl stop k3s
 sudo shutdown now
More about the Tanager
The tanager bird, known for its bright colors, has a symbiotic relationship with the papaya fruit, especially in tropical regions where both thrive. Tanagers are drawn to the sweet, juicy flesh of papayas and use their sharp beaks to peck at the fruit. In return, these birds help disperse papaya seeds. As they feed, they often carry the seeds to new locations, dropping or excreting them, which supports the spread of papaya plants. This mutual relationship benefits both the tanagers, who get a tasty meal, and the papayas, which rely on birds like the tanager to ensure their seeds are scattered and new plants can grow.
References
- Building a bare-metal Kubernetes cluster on Raspberry Pi
- Step-By-Step Guide: Installing K3s on a Raspberry Pi 4 Cluster
- K3s Under the Hood: Building a Product-grade Lightweight Kubernetes Distro - Darren Shepherd
- How To Generate SSH Key With ssh-keygen In Linux?
- OpenWRT
- TP-Link TL-WR902AC v4 OpenWrt : A friendly guide.
