
I’ve been a huge fan of Apple products ever since I bought my first MacBook. I love how instinctive it is to use them and I’ve only experienced a low amount of crashes. As a company, Apple sadly has many shortcomings which I won’t even try to list nor deny, but when it comes to the final product: it simply works.
Today, as the rain falls down on Zürich, I decided to retire my old MacBook Pro (Retina, 13-inch, Early 2015) because, after nine years of loyal service, it doesn’t meet my needs anymore. Through my studies and my current job, I’ve come to work more and more with Linux servers. This got me thinking: Why don’t I install Linux on my old laptop? This would allow me to have my own little Linux machine to play around with as well as extend the lifespan of my hardware. I hope you’ll find the following instructions usefull and that somehow this will help make better use of the devices you already own instead of switching directly to a new one.
Hardware specs
- Processor 3.1 GHz Dual-Core Intel Core i7
- Memory 16 GB 1867 MHz DDR3
- Graphics Intel Iris Graphics 6100 1536 MB
Backup
Before installing Linux on your machine, it is important to backup all your data and operating system in case anything goes south.
- Store all data on an external hard drive using Time Machine
- Store a copy of macOS Monterey on a flash drive
- Download a full macOS installer from Apple
- Connect a USB flash drive to your Mac (16 GB)
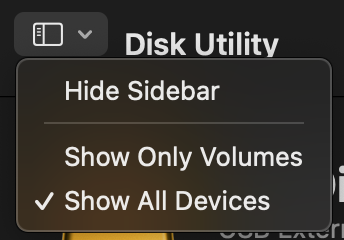
- Launch “Disk Utility” (press Command + spacebar and start to type Disk Utility)
- Click on “View” and select “Show All Devices”
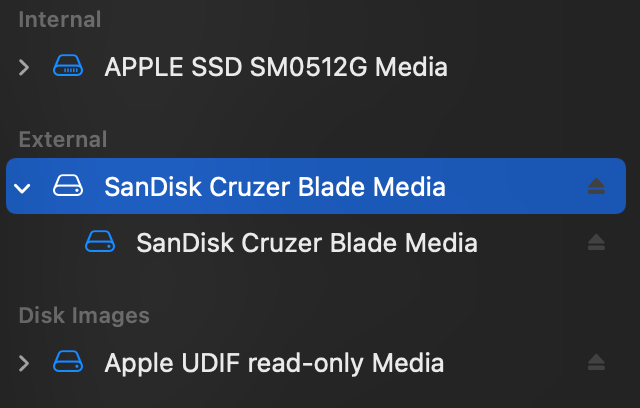
- Select the root drive of your flash drive in the sidebar (the next step won’t work if you only select the volume)
- Click on “Erase”
- Optional: Set the volume name (I entered “MONTEREY”)
- Choose “Mac OS Extended (Journaled)” as the Format
- Choose “GUID Partition Map” as the Scheme
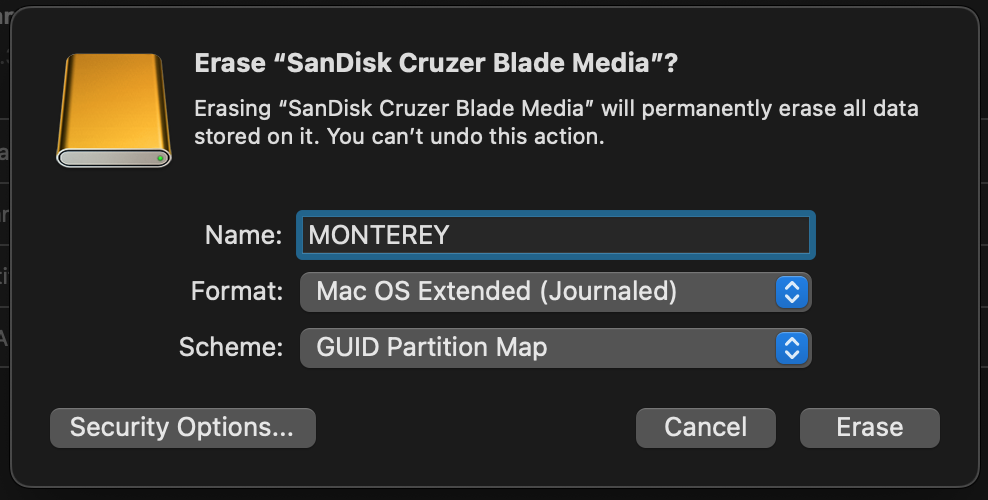
- Cick on “Erase”
- Wait (this can take a few minutes)
- Click on “Done”
- Open the Terminal (press Command + spacebar and start to type Terminal)
- Run the following command
sudo /Applications/Install\ macOS\ Monterey.app/Contents/Resources/createinstallmedia --volume /Volumes/MONTEREY - Enter user password when prompted
- Answer “Y” when prompted
- Wait (this can take a few minutes)
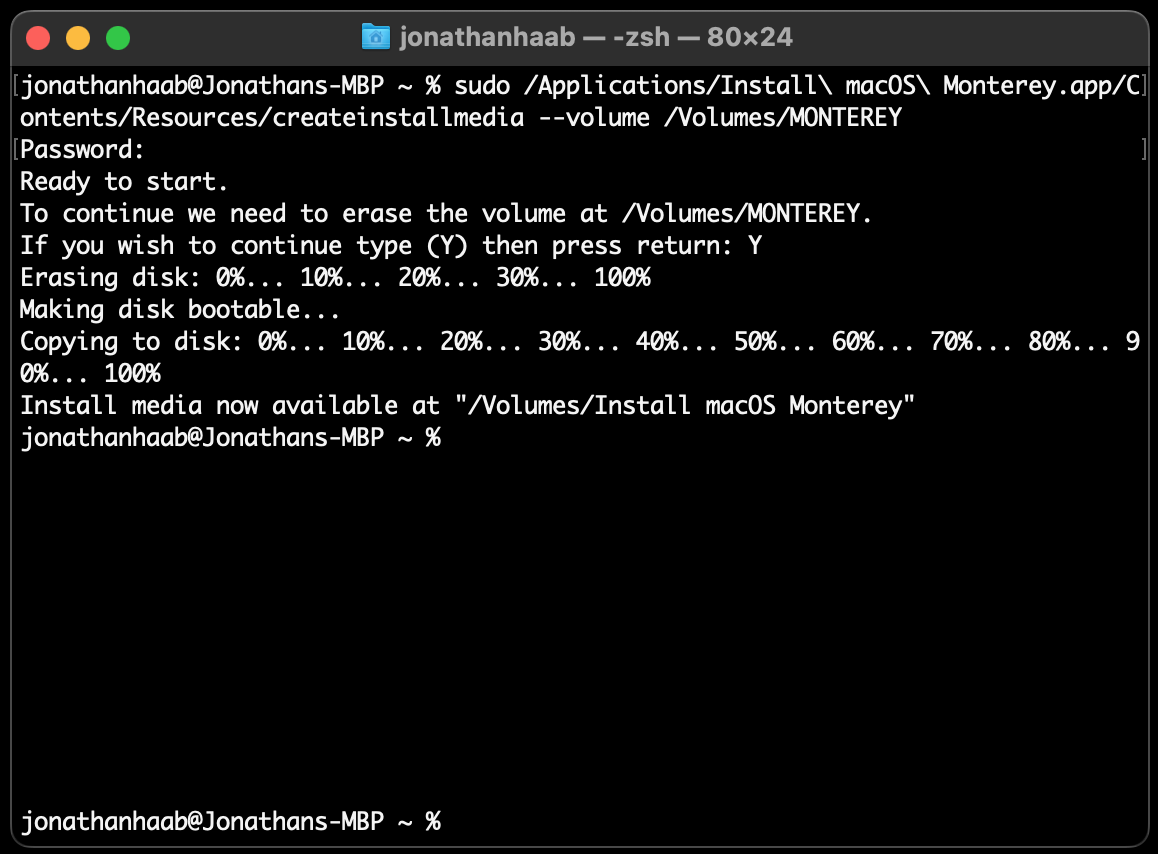
- Done!
Linux installation
![]()
I chose to install the Linux Mint (Cinnamon) as I’ve heard it is the most beginner friendly distribution out there. At the time of this installation, Linux Mint 22 “Wilma” is the latest release.
- Create a bootable USB stick
- Download the official shasum
sha256sum.txt - Download the official PGP signature
sha256sum.txt.gpg - Verify the authenticity of the official shasum
gpg --verify sha256.txt.gpg sha256sum.txt - Download Linux Mint from one of the available mirrors
- To get the shasum of the iso file you downloaded in the previous step, run
sha256sum -b yourfile.iso - Verify the integrity of the shasum by comparing the two shasum. If they do not match, download the iso file from a different mirror.
- Download and install Etcher
- Insert your USB stick
- Launch Etcher, select your iso file and your target flash drive (USB stick)
- Flash!
- Download the official shasum
- Boot Linux Mint
- Restart your laptop and hold the alt (or option) key
- Select EFI Boot
- Select “Start Linux Mint XX.X Cinnamon 64-bit
- Play around with the live session
- Install Linux Mint
- Double click on “Install Linux Mint”
- Select your language
- Select your keyboard layout
- Connect to the internet (I initially thought that the WiFi worked for me but I ran into troubles later on.)
- Tick the box to install the multimedia codecs
- Chose “Erase disk and install Linux Mint”
- Select your timezone
- Enter your details
- Wait (this can take a few minutes)
- Restart your machine
- Update Linux kernel
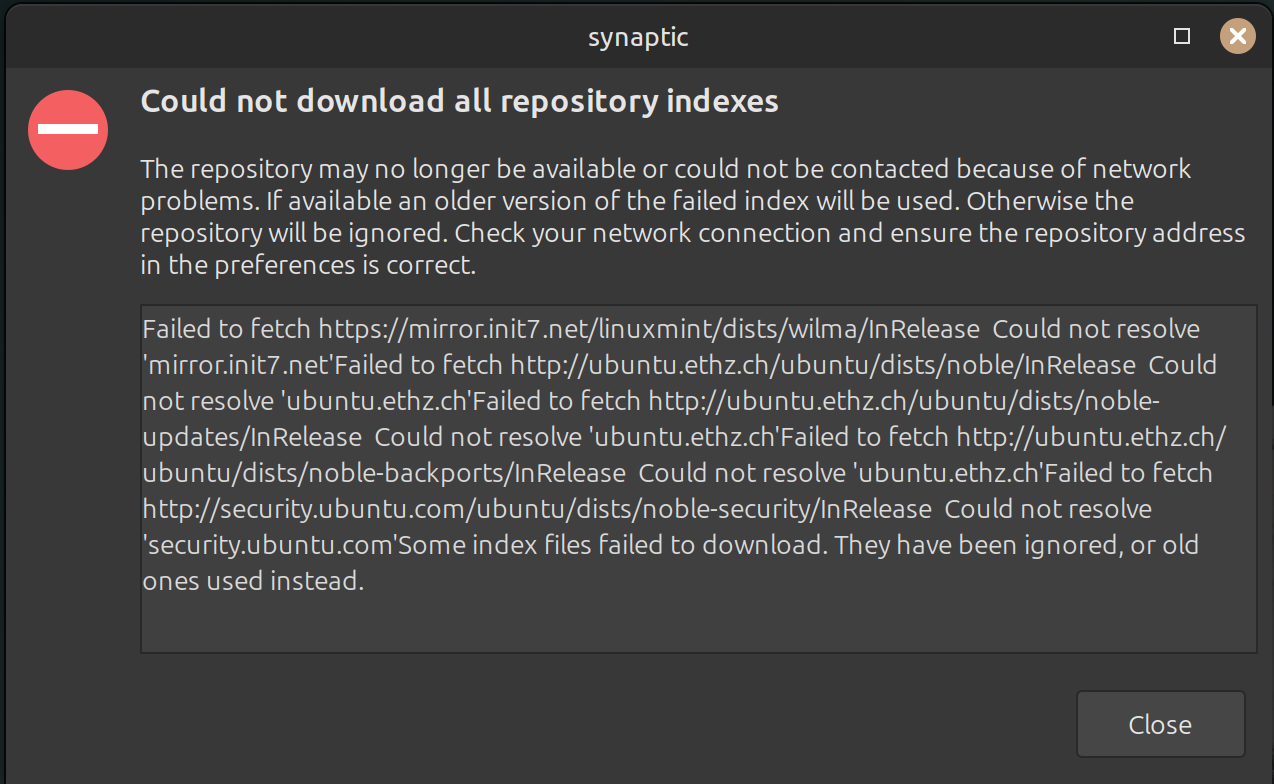
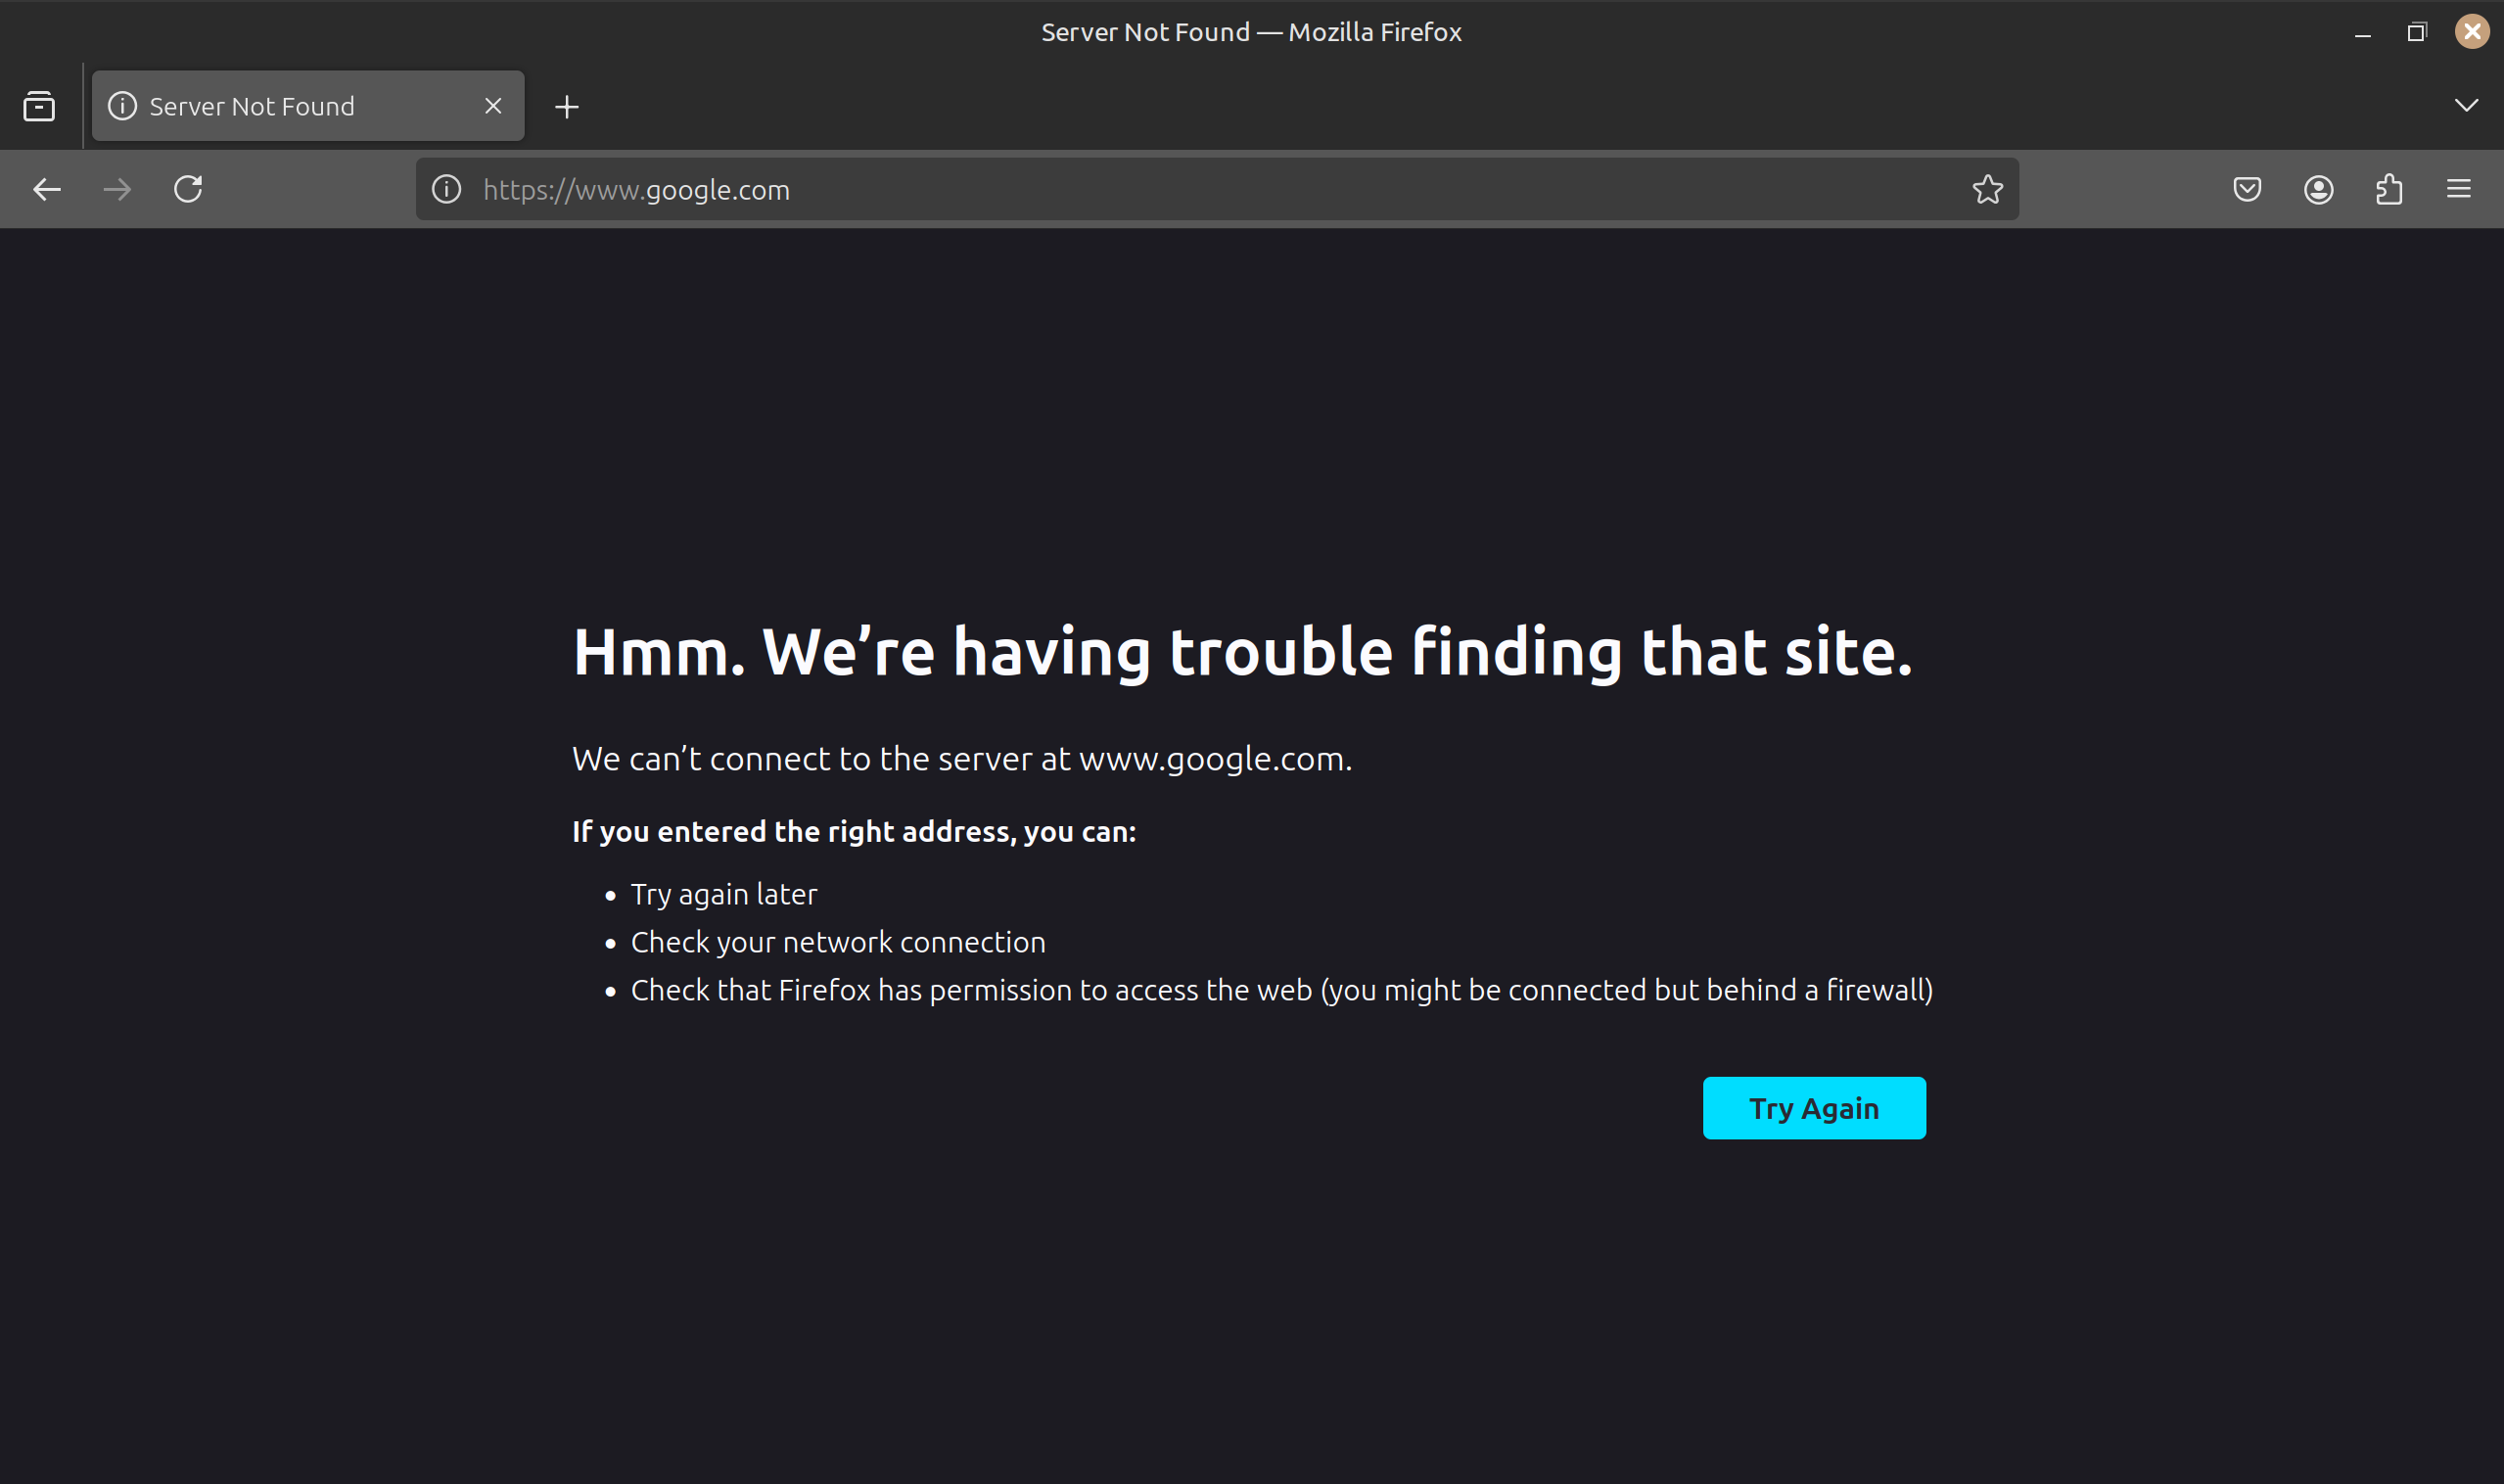
- Despite being connected to the WiFi, I could not access the internet through Firefox (Server not found). Running
ping -c 4 google.comfrom the terminal did not work either. I went through the following steps to solve this issue.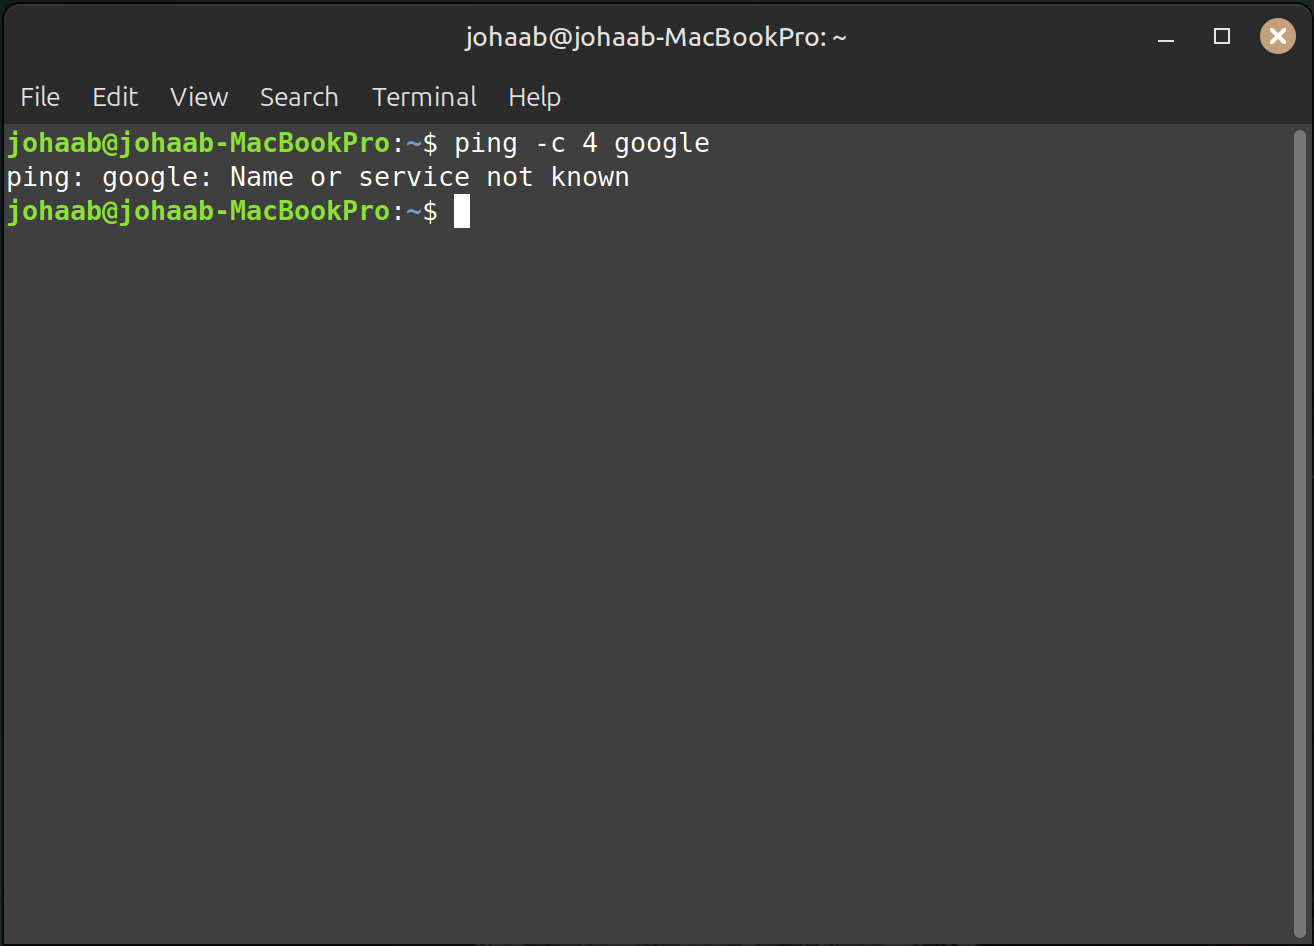
- Use tethering with your phone (in my case, I used an iPhone 12 mini, iOS 17.5.1)
- Launch the “Update Manager”
- Click on “Refresh”
- Observe that an update is available for the Linux kernel
- Click on “Install Updates”
- Reboot
- Disconnect the phone
- Check that you are connected to your WiFi network
- Successfully ping google from the terminal
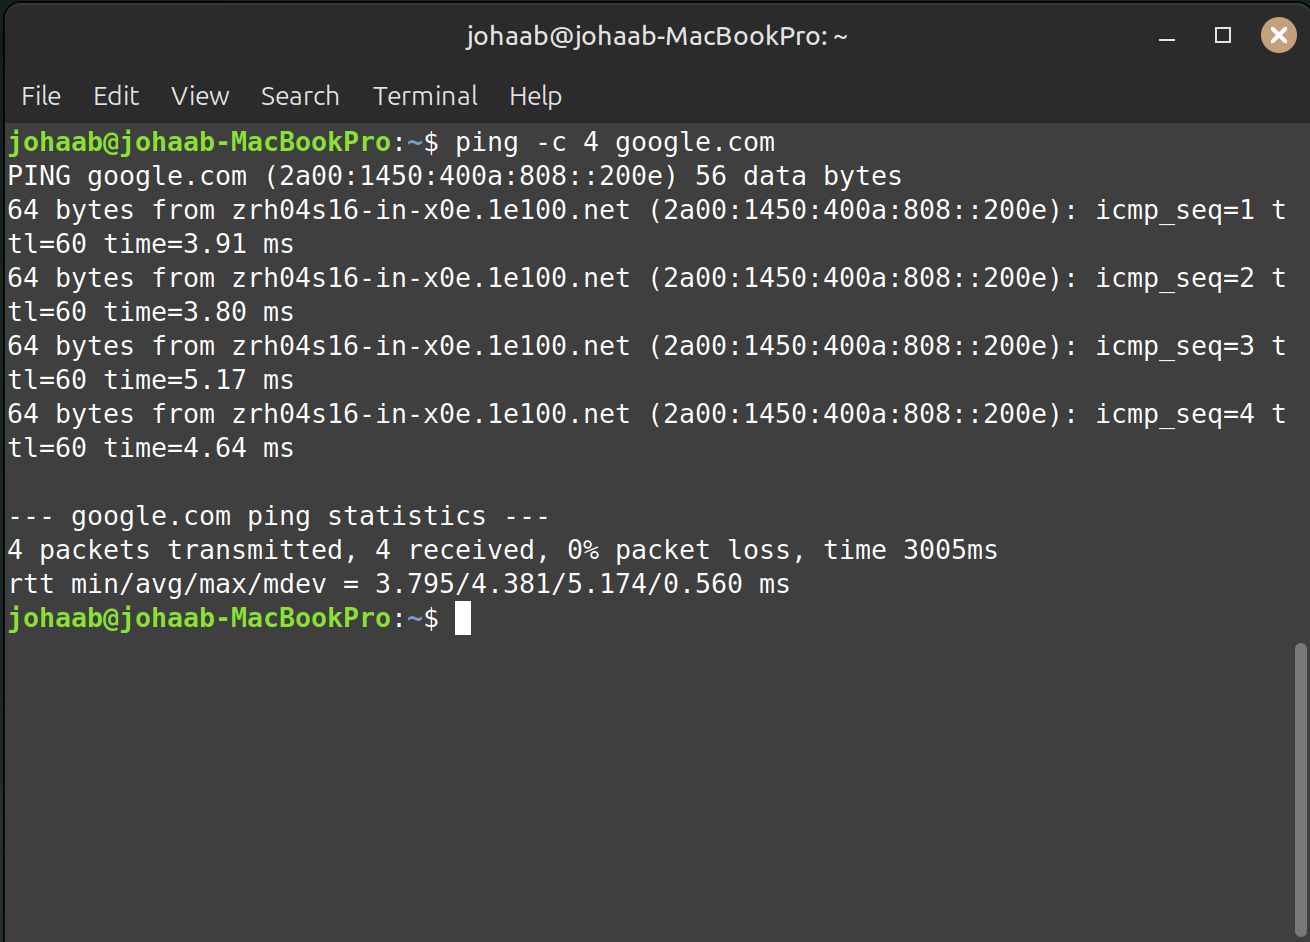
- Successfully access google using Firefox
- Despite being connected to the WiFi, I could not access the internet through Firefox (Server not found). Running
- Done!